

How to Safely Move a Treadmill Without Damaging the Display or Wiring
A treadmill can take up most of a doorway and weigh more than you expect. But some of the easiest parts to damage are the small wires hidden inside the console supports. A cable caught under a bracket or pulled by a falling console can turn a straightforward move into a repair.
Careful disassembly starts with exposing those wires and protecting them before removing the display and its supports. Here’s the order we follow, with adjustments for the treadmill’s model and construction.
Before starting, check the manufacturer’s instructions for your exact model. Turn the treadmill off, unplug it, remove the safety key, and follow any specified waiting period before disassembly. Clear the moving route and arrange enough help for the machine’s weight and size. SOLE’s moving guide covers these basic preparations.
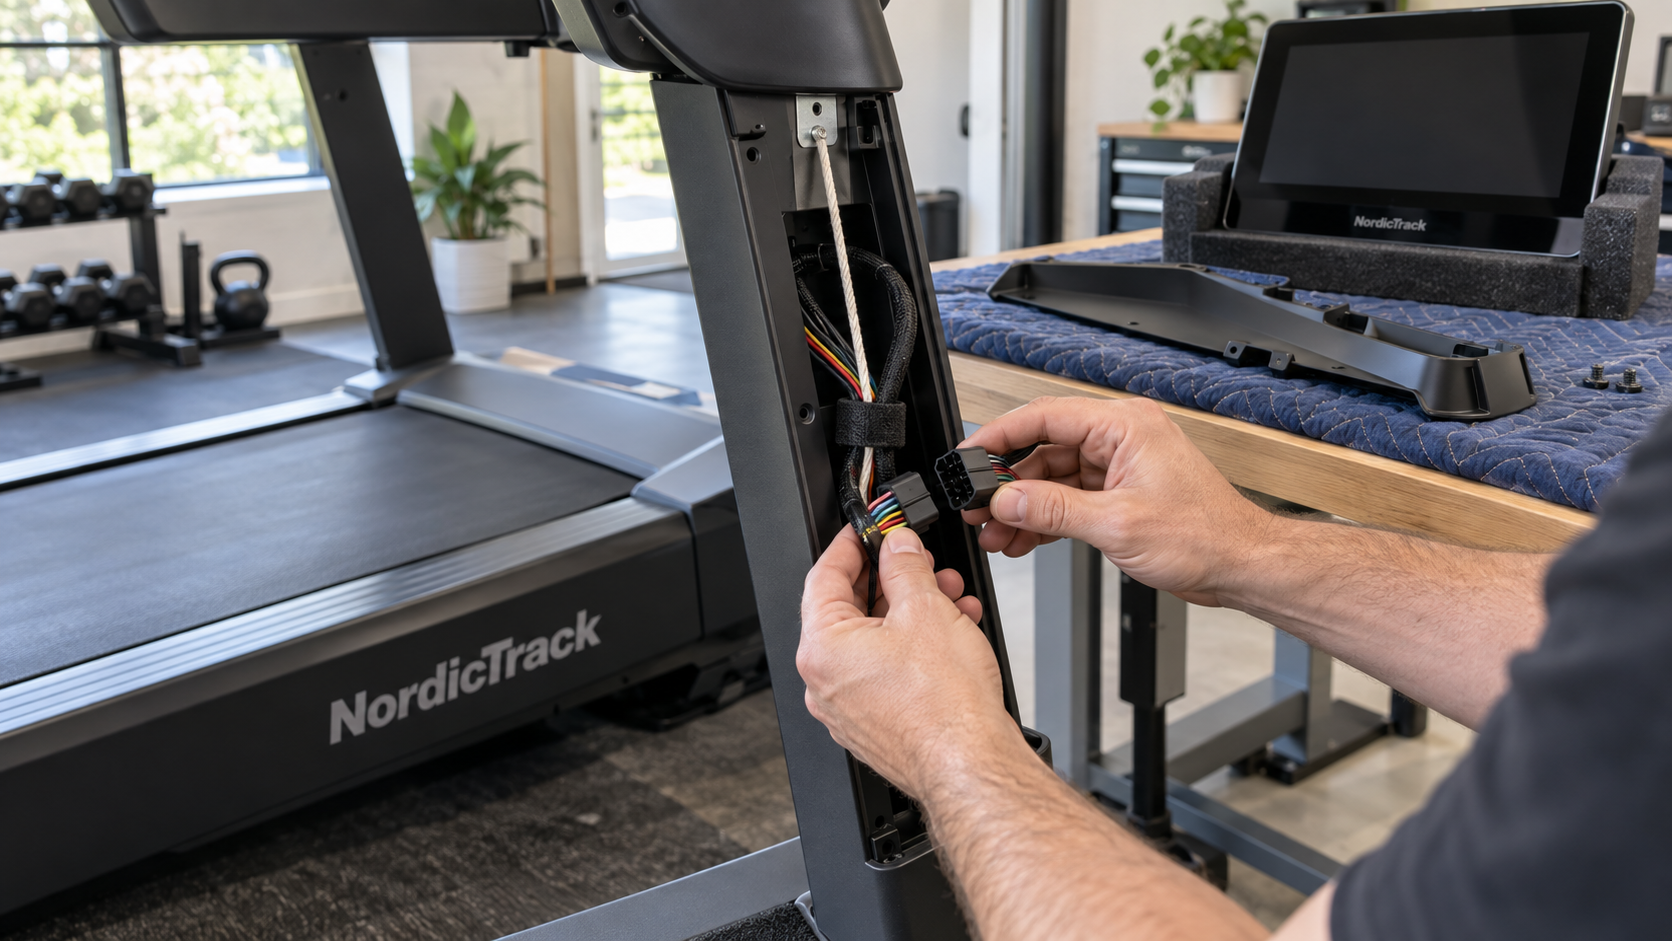
- Remove the plastic covers that hide the wire harnesses.
Start with the trim pieces and access covers around the console, upright supports, and connection points. Removing these exposes the wiring so you can see what needs to be disconnected before larger components come apart.
Work slowly around plastic tabs and clips. If a cover resists, check for another screw or a hidden attachment instead of forcing it. Keep screws in labeled bags so they return to the correct locations.
Take clear photos of the wire routing and connections before touching them. Include any clips, guides, or openings that hold the harness in place.
- Disconnect the wire harnesses and remove any that could be damaged during disassembly.
Release each connector’s locking tab, if fitted, and separate the connection by holding its plastic housing. Never pull on the wires themselves. If a connector will not release, check how its latch works before applying more force.
Label matching connections when there is any chance of confusion. Look for additional wiring to handrail controls, pulse sensors, or other console features before assuming everything is disconnected.
Where the model allows it, carefully withdraw harness sections that could get trapped, stretched, or cut when the console supports are removed. Release the necessary retaining clips first. A harness should not be dragged past a sharp edge or pulled through an opening that cannot accommodate its connector.
On certain models, we attach a guide string before withdrawing the harness through an upright. As the harness comes out, the string takes its place. We secure both ends so it stays accessible, then use it to help guide the harness back through during reassembly. The attachment must avoid loading individual wires or connector pins. If anything snags, stop and check the route.
This method depends on the treadmill’s design. Some manufacturers provide a lead wire for routing the console cable, as shown in the Horizon T700/T800 assembly instructions.
- Secure the loose wiring before removing the display.
Coil removed harnesses loosely and protect the connectors from impact. Avoid tight bends, tight cable ties, or adhesive directly on connector contacts.
Any wiring that stays attached needs to be secured clear of bolt holes, brackets, folding joints, and surfaces that will meet during reassembly. Leave enough slack that moving a component cannot tug on its connection.
Check each separation point before loosening the structural hardware. No wire should still bridge two parts you are about to pull apart.
- Remove the display, then the console supports.
Once the harnesses are disconnected and protected, have a helper support the display or console assembly while you remove its mounting hardware. Follow the model’s removal sequence, keeping the assembly supported as the last fasteners come out.
Lift it away slowly and check for any remaining connection. Never let the console hang by a cable.
Protect the screen with a clean, soft layer and padding that prevents pressure on the display. Pack it separately from loose hardware and heavy frame parts. Then remove the console supports, supporting each upright as its final bolts are removed.
- Move the frame and check the wiring during reassembly.
Use the manufacturer’s designated lifting points and moving instructions. Keep straps away from exposed wiring and plastic trim. For stairs or awkward turns, use movers equipped to handle the treadmill’s weight.
During reassembly, refer to your photos and restore the original cable routing. Before tightening each bracket or support, confirm that no wire sits between the mating surfaces or crosses a bolt hole. Reconnect the harnesses fully and replace their retaining clips.
Finish the mechanical assembly and reinstall the covers before reconnecting power. Complete the manufacturer’s startup checks and a controlled low-speed test before using the treadmill.
A few extra minutes spent exposing, labeling, and securing the wiring can prevent damage that is difficult to spot once everything is bolted back together.




Leave A Comment